easy2boot gets better and better

Be safe. Stay home. While working longer days now, COVID-19 has given an opportunity to brain dump topics I have been meaning to properly document.

Case-and-point: easy2boot is wonderful. You can boot literally anything off a USB stick. Windows 10 unattended? Yes. Name-your-partition-ISO? Yes. Tivo MFS Tools for hard drive cloning? Yes. Linux flavors? Absolutely. Random PCs that only do BIOS updates via ISO? Yes. And the list goes on… I use it almost daily and support the developer.

Hard to believe its been almost 5 years since relying on easy2boot. 2015 Post: easy2boot & WSUS Offline; a must-have USB stick for Technology professionals

In the past few months, easy2boot can now UEFI Secure Boot a Windows 10 Recovery Environment from a FAT32 secondary partition, from there you can swap in an .imgPTN file (now .imgPTN23), reboot, and now load whatever OS you choose from UEFI Secure Boot. Brilliant!

The easy2boot site does a superb job in documenting technical details however that is partly the challenge; its a lot to understand. My use case: an all-power bootable USB stick for Windows installations and WinRE to swap in-and-out different versions. I prefer two identical USB drives for redundancy. Two 64GB USB3.0 all-metal key-chain drives.

  • Download the latest version (as of writing: Easy2Boot_v2.00A_password_is_e2b.zip)
  • Make a new USB stick.
    As of v2.00, “The main change is that when you make a new drive, it will now download the agFM files and copy them to the second FAT32 partition (if present). This allows UEFI-booting to the agFM grub2 File Manager system. All thanks to ‘a1ive’ for developing his grub2 branch and agFM.”
    Make_E2B.exe and Make_E2B_USB_drive.cmd – downloads agFM if 2nd FAT32 partition is made. If drive is <128Gib then 2nd FAT32 partition of approx 500MB is automatically made.
  • Because my USB drives are 64GB, I resize (enlarge) the secondary FAT32 partition to ~1.2GB in size to handle the WinRE image [next step].
  • Add nodelay
  • Add “No key (choose a version to install).xml” to the _ISO\WINDOWS\WIN10\ and _ISO\WINDOWS\WIN7\ directories if not already present. These answer files allow for the “Repair” option.
  • Copy Win10 ISOs (I always keep a few builds handy; both x86 and x64 combo)
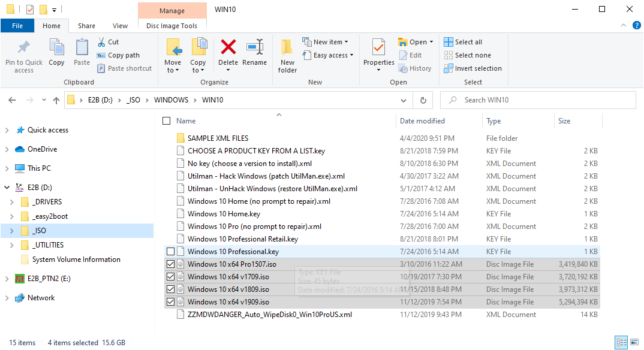
  • Copy Win7 USB3 ISO (if you have a reason; helpful still for in-place upgrades for activation)
  • Copy Windows 10 x64 v1909 Injected.imgPTN23. The .imgPTN23 file extension is important. Follow the Adding UEFI/.imgPTN images guide carefully; specifically the “To convert an ISO to .imgPTN file for UEFI-booting” section.
  • Copy Win10XPE_x64.ISO to the root of your secondary FAT32 partition. This is what you can UEFI boot. You have to make this .ISO file; use Win10PE utility to do it.

Enjoy easy2boot! Its quite wonderful and actively developed. Please support the developer who probably spends a good percentage of their life on this project.

easy2boot & WSUS Offline; a must-have USB stick for Technology professionals

I was in a difficult position.  I had an older family member drive a decent distance to get their PC fixed on-the-spot.  Long story short, they use their PC to upload insulin results and without these uploads, they have mandatory visits to the endocrinologist.

After determining the motherboard was the culprit (swapping RAM, PSU, CPU) I swapped their hard drive to another system.  Yes, I know a clean install would have been the preferred method.  However this is the “real world” and I decided to swap the hard drive rather than struggling to get Java 1.6  working (required for the insulin pump uploads; yes, I know its terrible; thank healthcare vendors), some audio recording software, and a user who needs the same icons, workflows, printer, and Quattro Pro.

Enough introduction.  The old system was a Dell Dimension 3100 Windows 7 x86 PC running in AHCI mode.  I anticipated boot issues related to different storage controller(s) after the swap.  Typically when I am planning to move from one motherboard to another, I will run “sysprep /generalize” before moving.  This “preps” Windows for the move and usually gracefully handles new hardware/HAL/storage controller(s).

In this example, I could not boot the original system, so this brings me back to the title of this post: easy2boot.  In short, easy2boot is by-far the best USB drive creation tool/utility out there.  I needed to run the HDC_fix which attempts to detect the new storage controllers and injects the appropriate drives to an offline system.  The HDC_Fix is found on many Windows PE boot .ISOs; e.g. UBCD4Win, Hiren.  In this case I used UBCD4Win.  My typical bootable USB sticks were not working (the new Acer motherboard seemed to have major issues booting USB devices) and my older boot CDs either were too old or the optical drive was unable to read the burned media.

In frustration, here were the steps that saved the day:

Step 1: Read the easy2boot “Introduction” page.

Step 2: Go to the Download page and get the “Download E2B+DPMS” version (v1.69 at the time of posting).  Extract the .zip.  I inserted a blank 32GB USB drive.  Run the “Make_E2B_USB_Drive.cmd” script to make the 32GB drive bootable with easy2boot.  I choose to format the drive as NTFS so it can handle files >4GB without any major drawbacks.

Step 3: Download the UBCD4Win ISO.

Step 4: Copy the UBCD4Win .ISO file to \_ISO\MAINMENU\ on the newly formatted, bootable 32GB USB drive.  E.g. E:\_ISO\MAINMENU\.

Step 5: Enjoy.  The new Acer system booted easy2boot without issue and the easy2boot menu auto-populated the UBCD4Win .ISO.  I ran the HDC_fix on the D:\ drive (the actual physical disk). When booting Windows off a USB drive, the C:\ is typically the “RAM Disk” or virtual drive not the actual physical disk/hard drive.  It will typically be mounted to another drive letter; e.g. D:\ or E:\.  It should be obvious because it will be the correct size and and hopefully an informative partition label.  Upon reboot, Windows 7 was happily booting.  A few minutes later with new drivers and my relatives were on their way.

Now, the post could end here, but this is where easy2boot really shines.  It can boot Windows installer .ISOs.  It can even boot UEFI Windows installers; e.g. Windows 8.1 and Server 2012 R2.

So I went to town and copied Windows 7 SP1 x86, x64 and Windows 8.1 x64, and Server 2012 R2 x64, and Windows XP SP3 (for nostalgia) to their respected folders; i.e. \_ISO\WINDOWS\XXX.  I also went back to the easy2boot Download page and got the “MPI Tool Pack (MakePartImage)“.  (“MPI Tool Pack + Clover Lite v0.048 2015-04-16″ at the time of posting).  After extracting the .zip, I ran \ImDisk\imdiskinst.exe to install the virtual disk driver.  Then I easily drag-n-dropped the Windows 8.1 .ISO onto the “MakePartImage_AutoRun_FAT32.cmd” batch file and used all the defaults to generate a .imgPTN for Windows 8.1.  I placed this new .imgPTN in the \_ISO\MAINMENU\ (not the \_ISO\WINDOWS\XXX folders) and I was able to UEFI boot to install Windows 8.1.  Very impressive.

Kudos to rmprep (SteveSi) for developing easy2boot.  You earned my donation to support your project.

Lastly, to make my 32GB USB drive even more useful (and since it is NTFS I can put anything else I want on it), I added WSUS Offline.

WSUS Offline is another wonderful project that I have been using and supporting for years.  Download WSUS Offline (v9.6 at the time of posting) , extract it to your USB drive, and run the “\wsusoffline\UpdateGenerator.exe”.  Pick what versions of Windows you updates for, in my case “w61”, “w61-x64” and “w63-x64” (none of my Windows 8.1/2012 R2 installs are x86), and hit “Start”.
wsusoffline96

Wait for the updates to download.  Depending on your connection speed, it will take some time.  Once complete, you now have a USB drive where you can install Windows 7/8.1/2012R2/X and run Windows Updates all from one USB drive.  To run the WSUS Offline updates, go to “\wsusoffline\client\UpdateInstaller.exe” and hit “Start”.  I usually set it to “Automatic reboot and recall”.  It automatically brings a system current on Windows Updates.

Lastly I added a few other root directories on the 32GB USB drive for DRIVERS and UTILITIES.

So to recap, I have a 32GB USB stick that 1) can install different flavors of Windows in BIOS or UEFI modes, 2) can easily and efficiently patch the new Windows install using WSUS Offline, and 3) contains drives and utilities to get the system online and setup.  Enjoy.