Group Policy Preferences + Preference Item-Level Targeting + Security Groups = One Big Mess

Microsoft. While Group Policy Preferences, when they work, work wonders, when they do not work or the UI breaks them, I lose all confidence.

USE CASE: we recently deployed PaperCut across our multi-function printers (MFPs). [PaperCut, BTW, is an excellent product, especially for Healthcare and HIPAA compliant environments.] Globally I pushed the default, PaperCut virtual printer to all PCs. Users can print to the virtual and then then fetch their print jobs securely on any MFP across campus running the PaperCut embedded application.

However, we had certain user AND computer exceptions to the default printer; e.g. local USB printers or Terminal Services/RemoteApp servers. Loopback merging can get complex rather quickly (another good, quick refresher here). Group Policy Preferences Item-Level Targeting is a better solution. Read about it here from Microsoft directly.

In my default printer example, the intent is to exclude users and computers. To make it easy to manage, I created a Security Group name “PaperCut-NonDefault” that contained both users and computers I wanted to exclude. I then set “Targeting…” on the PaperCut preference.
PaperCut-Printer

In the Targeting Editor I created the following logic:PaperCut-Targeting

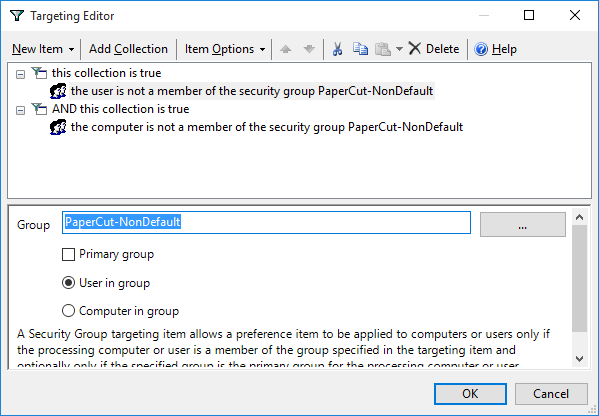
Now, up until this point, every seemed very straight-forward and yet the Targeting refused to work properly. If I added the users and computers directly into the Targeting Editor, I was able to get it working perfectly. The moment I used a Security Group, everything broke.

After sleeping on the problem, I finally came across this wonderful post. In short, do not use the “…” button to select your Security Group. Re-read that. In other words, do not use the DOMAIN\SECURITY_GROUP convention; just use the Security Group name only (as I have highlighted in the screenshot above). Based on the comments it appears that Microsoft has a hotfix which may solve the issue but I chose to fix it by dropping the “DOMAIN\”. Also note that I have two “Items” both calling the “PaperCut-NonDefault” Security Group. Targeting Security Group “Items” can only apply to either a computer or user; not both in one item. By having two items, I have one for users, one for computers.

With this subtle but critical change in place, the default printer Targeting works very effectively excluding certain users and computers. To make it even easier for our users, I added a second printer preference that ONLY applied to those in the “PaperCut-NonDefault” group which adds the PaperCut printer but does not set it as default. In other words, even users who do not want PaperCut as their default printer, they still get the PaperCut printer as an option.PaperCut-Targeting-NonDefault

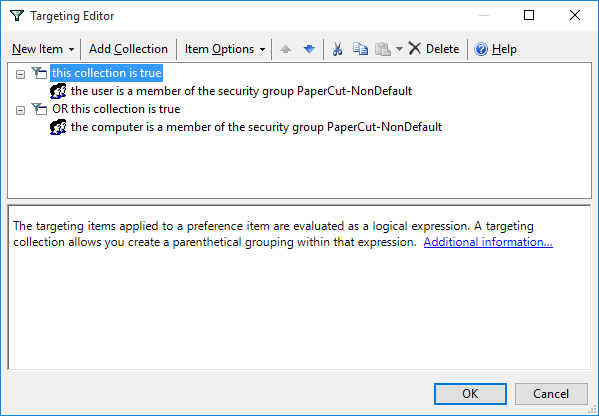
Enjoy. When Targeting works, its effective and powerful. Here are 10 things Group Policy Preferences can do better than your current script!

Safely grant only your PowerShell session “bypass” permission; “the file is not digitally signed. You cannot run this script on the current system.”

In short, this is my future quick reference:

Set-ExecutionPolicy -Scope Process -ExecutionPolicy Bypass

This sets the execution policy for only this session (process) of PowerShell and do not make the change permanent.

In contract, do not run:

Set-ExecutionPolicy RemoteSigned

This will set the policy for your LocalMachine, leaving you open to malicious PowerShell scripts in the future. Don’t do it.

See more here, here, and here if you want more information.

(I most recently used this “byass” for this excellent Exchange script to export all of our internal Distribution groups with one simple command)

RDS 2012 Certificates. SSO. A website is trying to run a RemoteApp program.

The goal was to remove this dreaded end-user dialogue box:
A website is trying to run a RemoteApp program. Make sure that you trust the publisher before you connect to run the program.

Simple right? Wrong; especially when I came across many blogs attempting to address RDS certificate issues. This one post gets you 90% there but was not complete. Specifically, see the red section below.
Steps:

  1. Get a certificate (in my case, a GoDaddy wildcard cert)
  2. Assign the certificate to the RDS roles. Refer to this great post with screen shots.
  3. Extract the certificate thumbprint, remove the “Get-Childitem Cert:\LocalMachine\My” PowerShell command on your RDS server or follow the steps outlined on Morgan Simonsen’s blog. Make sure you properly format the thumbprint: no spaces, all caps.
  4. Create and assign a GPO for the following settings:
    1. Computer Configuration > Policies > Administrative Templates > Windows Components > Remote Desktop Services > Remote Desktop Connection Client > “Specify SHA1 thumbprints of certificates representing trusted .rdp publishers”.
      Under Options, paste the formatted thumbprint.
      Specify SHA1 thumbprints of certificates representing trusted .rdp publishers
    2. Computer Configuration > Policies > Administrative Templates > Windows Components > Remote Desktop Services > Remote Desktop Connection Client > “Allow .rdp files from valid publishers and user’s default .rdp settings”.
      Enable.
    3. Computer Configuration > Policies > Administrative Templates > System > Credentials Delegation > “Allow Delegating Default Credentials > “Allow Delegating Default Credentials”.
      Enable and add “TERMSRV/<insert your RDS gateway/server name>” (refer to the example text in the GPO editor).
      Allow Delegating Default Credentials 
    4. Yet after repeated gpupdate /force and a full reset of IE settings, the dialogue warning persisted. Then I stumbled across these two nuggets: here combined with 2nd post down here. The “Specify SHA1…” GPO was not adding the proper “PublisherBypassList” keys.
      The solution? Manually adding the “HKEY_CURRENT_USER\Software\Microsoft\Terminal Server Client\PublisherBypassList” as a User Configuration GPO registry update.
      PublisherBypassList GPO
      Notice the key is the thumbprint above with an additional “00” placed at the end.
      PublisherBypassList regedit
      The easiest way to verify the key is to check the “Do not remind me….” on the RDS prompt. It will save the thumbprint for you in the proper format.
  5. For icing on the cake, enable single sign-on; see this excellent blog post or the official MSDN blog post“.

Enjoy. SSO RDS connections with no dialogue boxes or end-user warnings or prompts.